


DIY Bottle Tiki Torches: Turn Everyday Glass into Summer Magic
There’s something undeniably captivating about the glow of a tiki torch on a warm summer night. The soft flicker of flame, the gentle movement of light across your patio, and the cozy ambiance it creates can instantly transform an ordinary backyard into a relaxing retreat. Now imagine that glow coming from something you crafted yourself—something personal, creative, and completely unique.
One of the most charming ways to elevate your outdoor space is by using beautiful bottles and jars as the base for DIY tiki torches. Think about all the glass you already have or can easily find: elegant wine bottles in deep greens or ambers, vintage mason jars with their nostalgic appeal, sleek clear bottles for a modern look, or even colorful glass that catches the light during the day and glows warmly at night. Each bottle tells its own story and adds character to your outdoor décor.
Beyond their beauty, tiki torches are surprisingly practical. They provide gentle lighting for evening gatherings, help define outdoor spaces, and—when filled with citronella fuel—can even keep pesky insects at bay. Whether you’re hosting a backyard dinner, relaxing with a book, or enjoying time with friends, these handmade torches bring both function and atmosphere.


How to Make Your Own Bottle Tiki Torch
Creating your own tiki torch can be as simple or as decorative as you want. You can put one together in just a few minutes, or spend days customizing it with rope, shells, or other embellishments. Here’s how to get started.
What You’ll Need 

At a minimum, gather the following:
- The bottle of your choosing
- A brass plumbing coupler
- Important tip: If you’re working with a unique bottle shape, take your wick and bottle to a hardware store to find the perfect fit. Stores with a wide selection of couplers can make this much easier.
- 3/4″ wicks (buying in bulk is helpful if you plan to make several)
- A glue gun (only needed if decorating with rope or other materials)
- Rope (optional, for wrapping the base)
- Tiny pebbles or sand (a funnel helps here)
- Lamp oil (for indoor use) or citronella torch fuel (for outdoor use)
Choosing Your Bottle 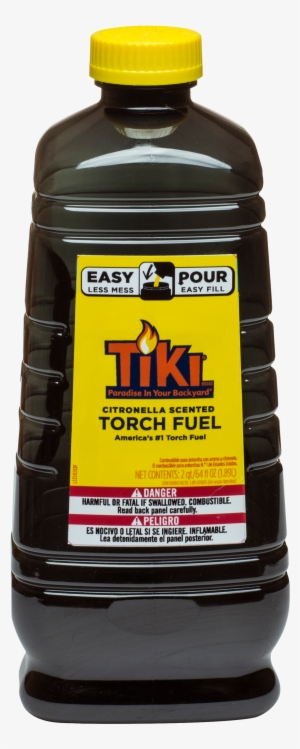

The beauty of this project is its flexibility. You can use:
- Wine bottles for a classic, elegant look
- Mason jars for a rustic or farmhouse style
- Decorative glass bottles for a more artistic feel
- Recycled containers to keep things eco-friendly
Make sure the bottle opening can securely hold the coupler and wick—this is key for safety and function.
Step-by-Step Instructions 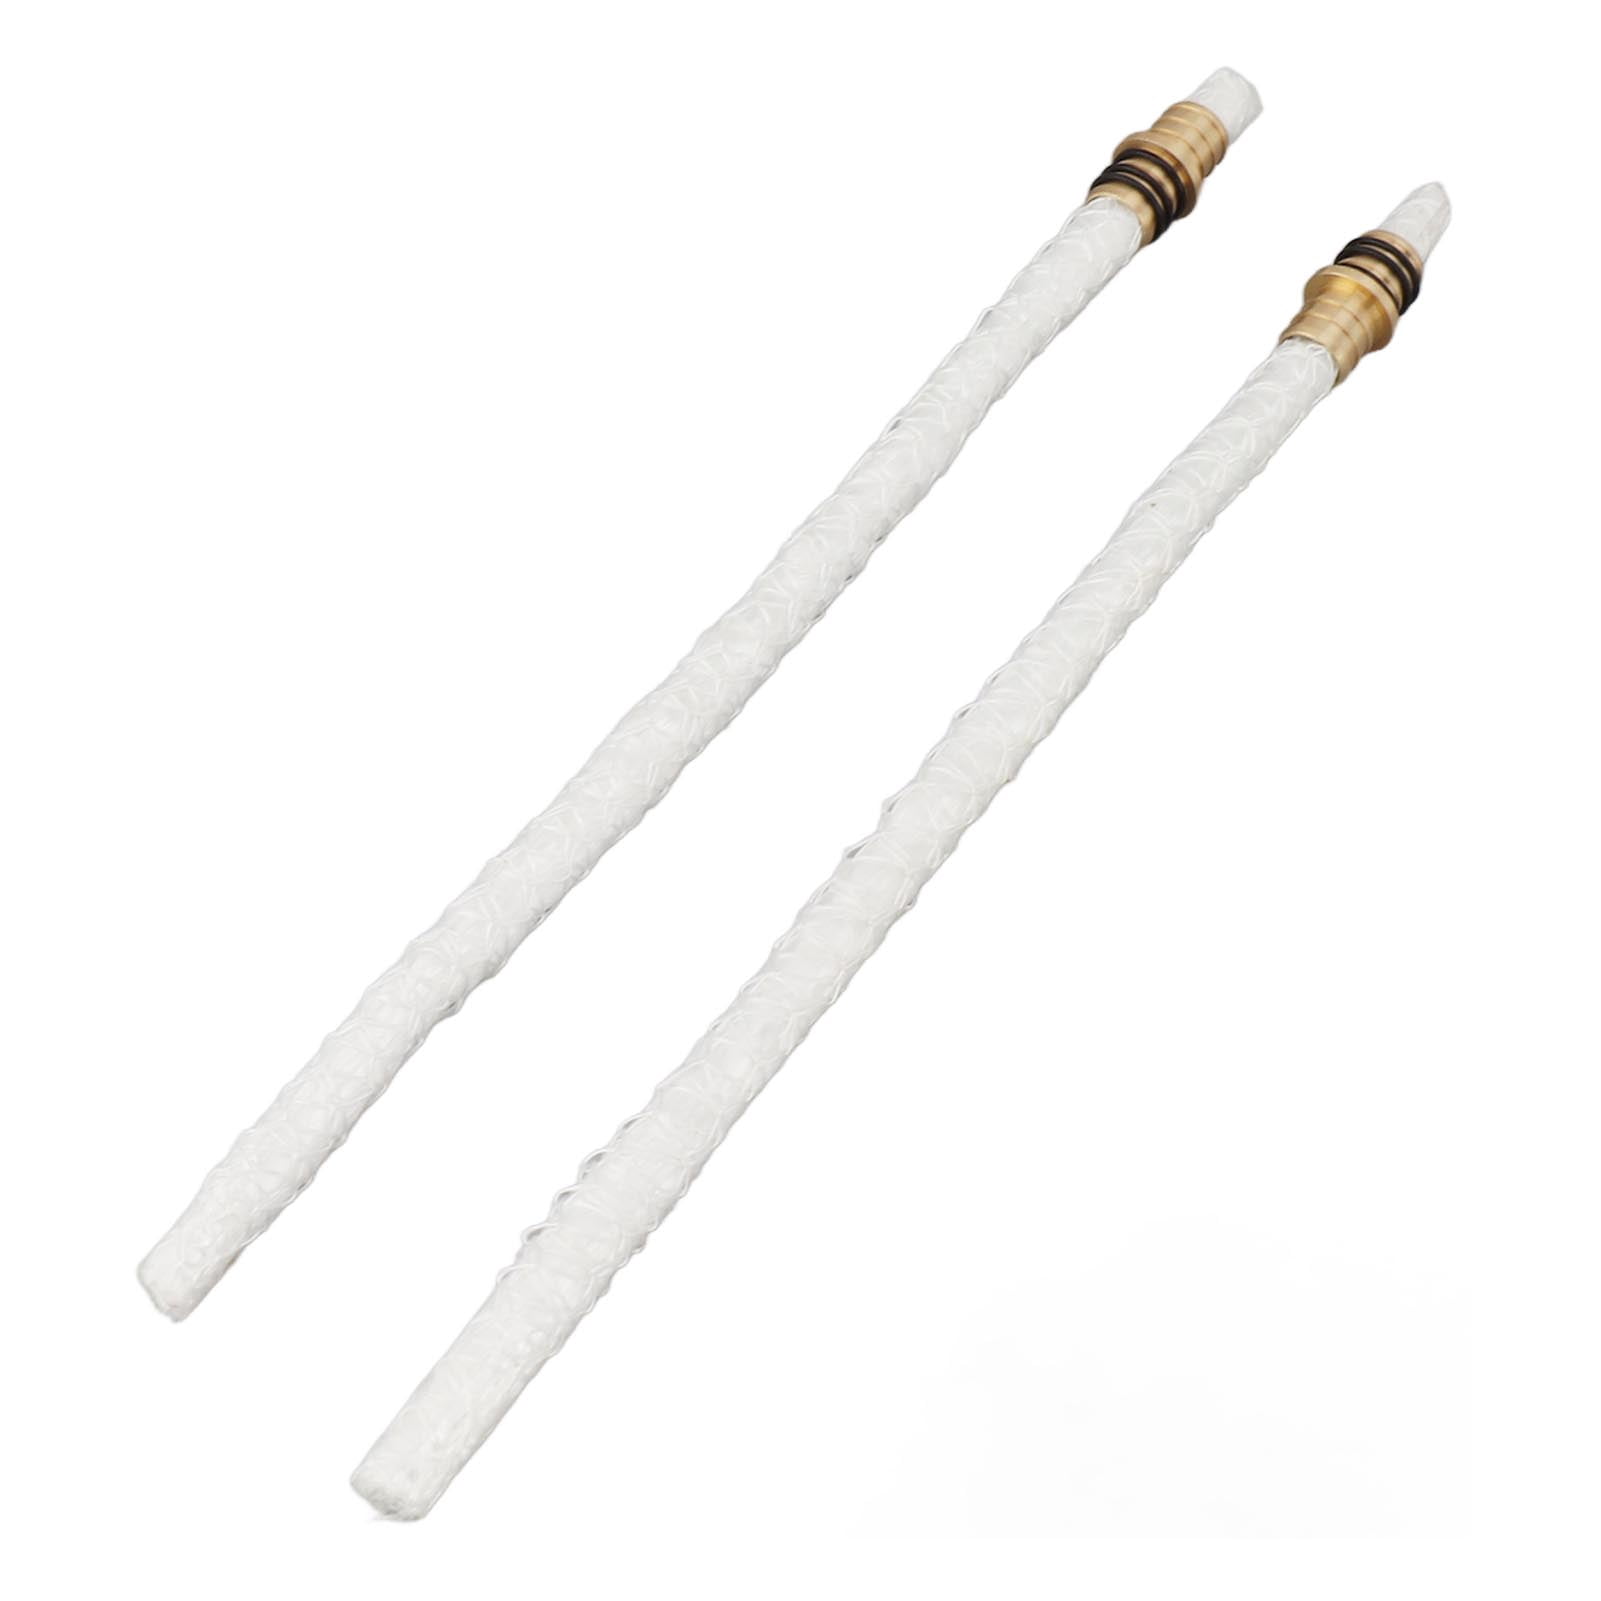

- Prepare the bottle
Clean and dry your bottle thoroughly. Remove any labels if you prefer a cleaner look. - Add pebbles or sand
Pour a small amount into the bottom of the bottle. This helps stabilize it and gives a nice visual touch. - Decorate (optional)
Wrap rope around the base or neck of the bottle using a glue gun. You can also attach seashells, starfish, or other decorative elements to match your outdoor theme. - Insert the wick and coupler
Thread the wick through the brass coupler, then fit the coupler snugly into the neck of the bottle. - Fill with fuel
Carefully pour in your chosen fuel:- Use lamp oil for indoor use—it’s clean, odorless, and smokeless.
- Use citronella torch fuel for outdoor use to help repel insects.
- Let the wick soak
Wait about 20 minutes before lighting. The wick needs time to fully absorb the fuel. - Trim the wick (important)
If using lamp oil, trim the wick so it’s level with the top of the coupler. This prevents an overly large flame.
A Few Helpful Tips 

- Always place your torch on a stable, heat-resistant surface
- Never leave it unattended while lit
- Keep extra fuel stored safely and away from flames
- Experiment with different bottle shapes and decorations to match your style
Light Them Up and Enjoy
Once your tiki torches are ready, it’s time for the best part—enjoying them. Arrange them along a patio, line a walkway, or use them as table centerpieces. As the sun sets and the flames begin to flicker, you’ll see just how much warmth and charm they add.
There’s something special about creating your own outdoor décor. These DIY bottle tiki torches aren’t just functional—they’re personal. Each one reflects your style, your creativity, and your idea of a perfect summer evening.
So light them up, sit back, and let your backyard glow.